
In this article, we would like to show how JetBot's webhooks work with your own back-end integration scenarios.
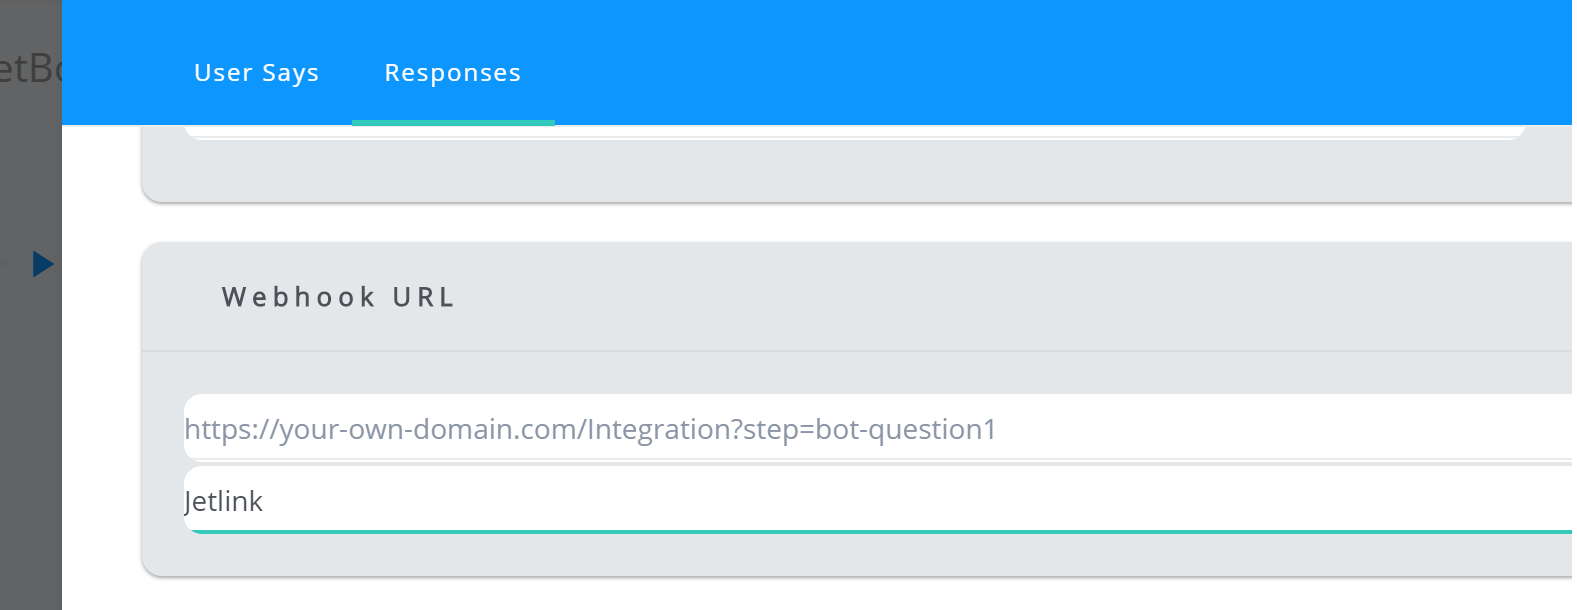
You can post JSON formatted data to your own back-end which is returned by Jetlink NLU API. These settings can be found on JetBot' intent settings. There are different types of reponses that JetBot can reply. You can also send different action types as JetBot response. The one of these response type is "Webhook" as shown below screen.

When you choose webhook action type as a JetBot response, you will need to provide your own url to process JSON data posted by jetlink. We both support http and https URLs, but we strongly recommend that you use https based domains for webhook integrations.
You can also use SecretKey data to make sure that, the post is done exactly by Jetlink platform. Because the SecretKey variable will be send back to you within the data posted as JSON.
Below sections, we describe JSON formatted message details posted by Jetlink platform.
When you set an URL to post Jetlink NLU response, you will get following data.
{
"Id": "1db4ebaa-cf62-4ddc-a72b-42ebb8b130c9", //the unique identifer of the response
"Timestamp": 1533204167, //timestamp of response date
"Language": "", //bot language (empty by default)
"SessionId": "5b62d633632e1d1c18c305ba", //Conversation Id variable by chatbot and user
"Result": {
"ResolvedQuery": "May I learn my order status?", //text sent which is written by the user
"IntentId": "5b62d01a632e1d1944ffc1b3", //IntentId variable that is triggered by JetBot back-end
"IntentName": "Order Status", //Intent Name saved in JetBot creation UI.
"IntentType": 1, //Intent Type=> 1: Text, 2: Fallback, 3: Welcome, 4: Dialogflow (for extarnel integrations), 5: FollowUp, 6: HumanTakeOver
"Action": null, //If you write any Postback value in JetBot creation UI., this data will be send in that area.
"Parameters": [], //If any intent parsed by JetBot platform, these parsed entities will be seen in that section.
"TextResponse": null, //This part is deprecated in current API. You don't need to consider.
"Responses": [ //Responses that will be given by the JetBot. Different response types will be described below.
{
"Type": 1,
"Texts": [
"I will check your order status, please wait.."
],
"ShowDelaySeconds": 0
}
],
"Confidence": 1, //Confidence level of triggered intent
"HumanTakeOver": false, //If JetBot state needs to be transfered to real human, this part will be send as true.
"SendContactInfoCollector": false, //If JetBot needs to send ContactInfoCollector, this part will be send as true.
"SendContactInfoCollectorDelayTime": 0, //ContactInfoCollector typing indicator display time
"HumanTakeOverDelayTime": 0, //Transfering to HumanTakeOver delay time in seconds (type is double such as: 2.5)
"IsInBusinessHour": false, //If the Business hours settings is active, JetBot will check the business is in working hours or not. If it is in working hours, this data will be send as true.
"OnlineMessage": null, //You need te type both online and offline messsages in JetBot Creation UI to use human takeover scenario, these typed messages will be send in that fields. If IsInBusinessHour is true, you need to send OnlineMessage to the user. If not, you need to send OfflineMessage content.
"OfflineMessage": null
},
"Status": {
"Code": 200, //This is success error code written by the API. If any error occured, the error code will be send in this field.
"ErrorType": "Success",
"ErrorId": "",
"ErrorDescription": ""
}
}
Such an above JSON formatted data, will be sent to your webhook url. There are different type of responses with in these JSON formatted data.
You may have multiple responses in that field with different types.
We will explain these different response message types.
Text Message Response
{
"Type": 1,
"Texts": [
"I will check your order status, please wait.."
],
"ShowDelaySeconds": 0
}
Type: 1 indicates that this is text message type.
Texts: Message text content
ShowDelaySeconds: Typing indicator display time in seconds (double typed variable such as; 2.5)
Image Message Response
{
"Type": 2,
"ImgUrl": https://image-url.com/my-image.png",
"ShowDelaySeconds": 1.7
}
Type: 2 indicates that this is image message type.
ImgUrl: Image's public web url to be displayed.
ShowDelaySeconds: Typing indicator display time in seconds (double typed variable such as; 2.5)
Quick Replies Message Response
{
"Type": 6,
"Title": "Which type of support do you need?",
"Replies": [
{
"Title": "Technical Problem",
"PostBackVal": "Technical Problem"
},
{
"Title": "Account Upgrade",
"PostBackVal": "Account Upgrade"
}
],
"ShowDelaySeconds": 0
}
Type: 6 indicates that this is a quick replies message type.
Title: Title of the message content
Replies: Button list that will be displayed on message
Replies.Title: Display text on the button.
Replies.PostBackVal: This is the text value that will be sent back to chatbot.
Cards Message Response
{
"Type": 4,
"Cards": [
{
"Type": 3,
"ImgUrl": "https://image-url.com",
"Title": "Display New Car Models",
"Description": "",
"CardButtons": [
{
"ButtonTitle": "✅ Choose",
"ReturnVal": "Choose Cars"
}
]
},
{
"Type": 3,
"ImgUrl": "https://image-url.com",
"Title": "Customer Support",
"Description": "",
"CardButtons": [
{
"ButtonTitle": "✅ Choose",
"ReturnVal": "Customer Support"
}
]
}
],
"ShowDelaySeconds": 2
}
Type: 4 indicates that this is a cards message type.
Cards: This is the aaray of card object.
Cards.Type: 3 indicates that this is a card object. do not need to change this type to another.
Cards.ImgUrl: You can set an image url here to show on top of the card item.
Cards.Title: Title of the card object.
Cards.Description: Description of the card object.
Cards.CardButtons: Array of card item buttons. Maximum 3 button is allowed.
Cards.CardButtons.ButtonTitle: You can set visible button title conttent here.
Cards.CardButtons.ReturnVal: You can set a postback message or web url here. If you set web url, that link will be opened when user cliecks the button.
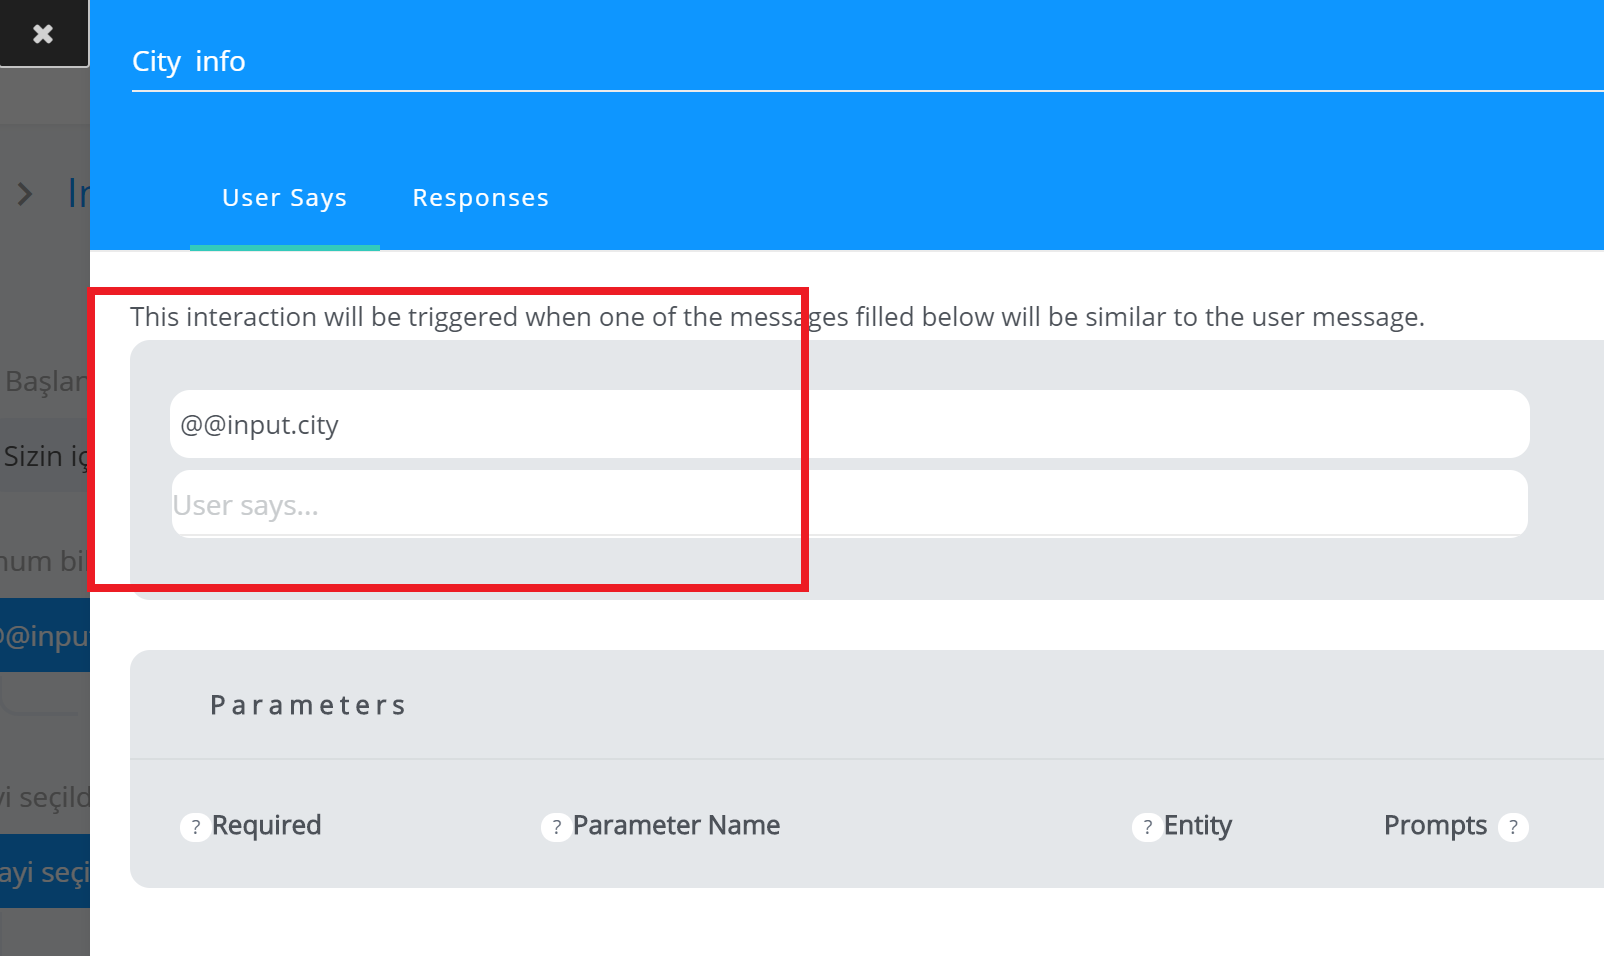
How to use inputs in a JetBot flow?
If you need to get some inpu from the user. You can create a floow-up intent in JetBot flow. And you should enter @@input.input-name in user says field. @@input. is the reserved word in JetBot API.
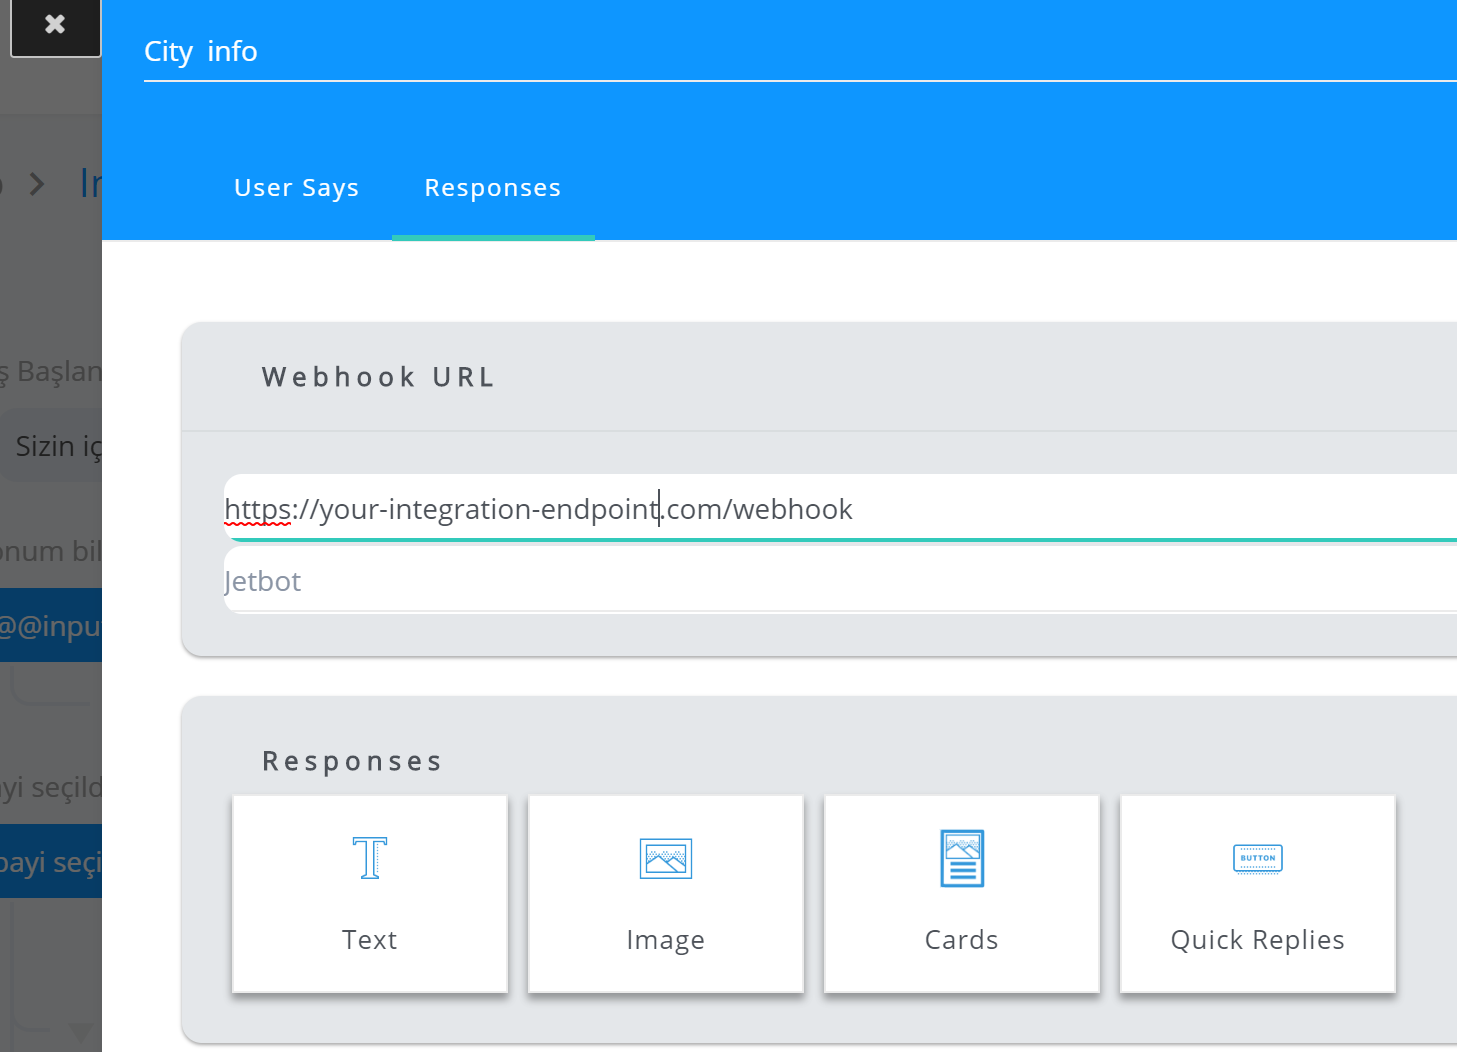
After creating such an intent, Jetlink NLU API will send the text written by the user to your webhook url saved in this intent's responses.
Then you can parse this data wrritten by the user and after that you can send a reply to the user according to your back-end flows.
You need to use Jetlink NLU API's SendJetBotReply endpoint to send back a message to the user.
You can find detailed information about how to use SendJetBotReply API endpoint on the following url.
If you need more support on Jetlink platform's integration features, please reach us via hello@jetlink.io