To make these adjustments, log in to the Jetlink panel, navigate to the Settings page by clicking the ☸️ icon at the bottom of the left-hand menu, and then access the Web Messenger screen under the Channels section.
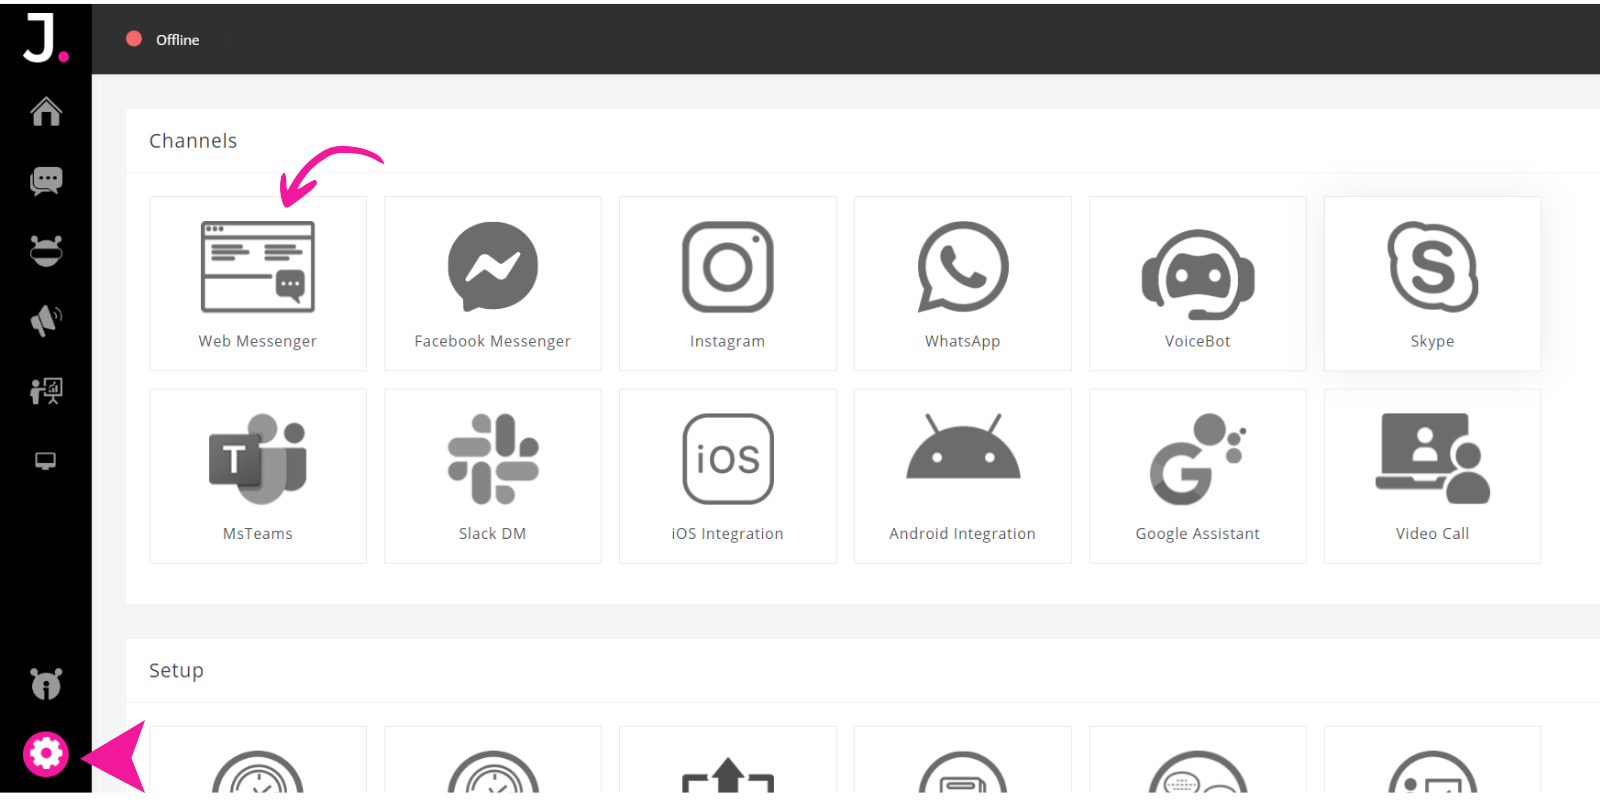
On the Web Messenger screen, you will find parameters for customizing the color and text appearance of your chatbot. In this section, you can adjust the Base, Content, and Notification Background Colors of the Messenger using your brand's specific color codes.
Below the color customization parameters, you can remove the Background Image in the Messenger header and arrange the Quick Reply Buttons to be displayed in a vertical layout.


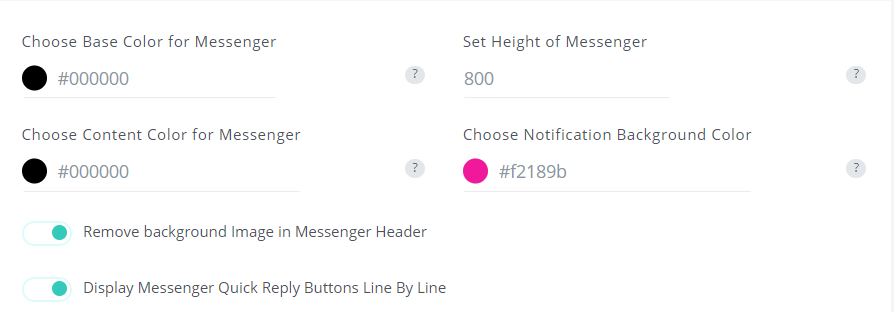
You can customize the visible title of your chatbot (Title of Messenger) and the welcome message (Type Messenger Welcome Message) from the relevant fields. Additionally, you can adjust the button colors to match your brand's specific color codes.
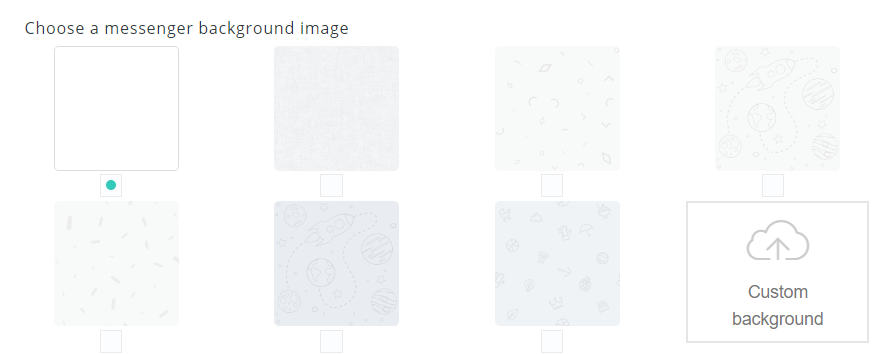
Just below the color customizations, you can personalize the Messenger Background by selecting from pre-made images or uploading an image of your choice into the panel.
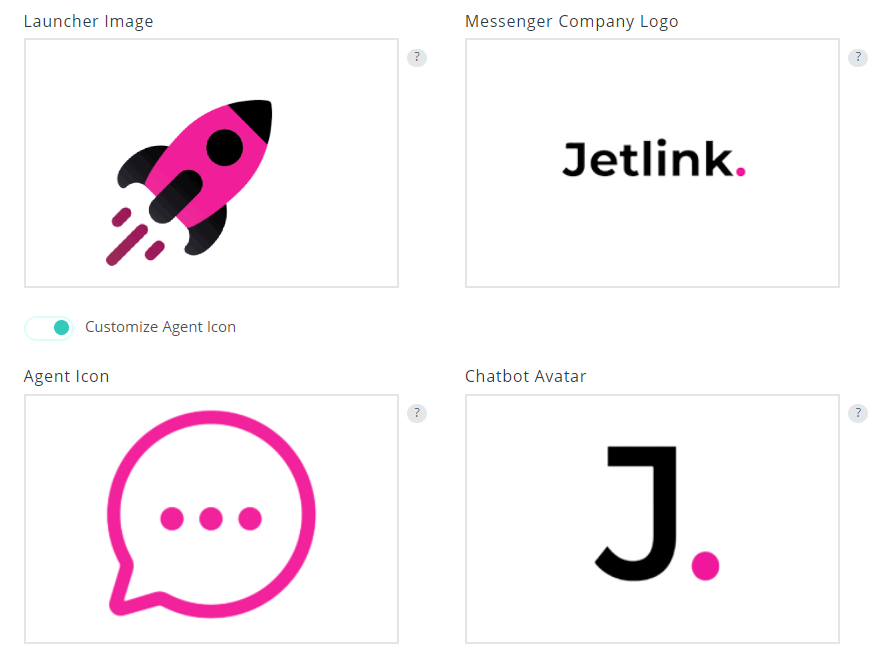
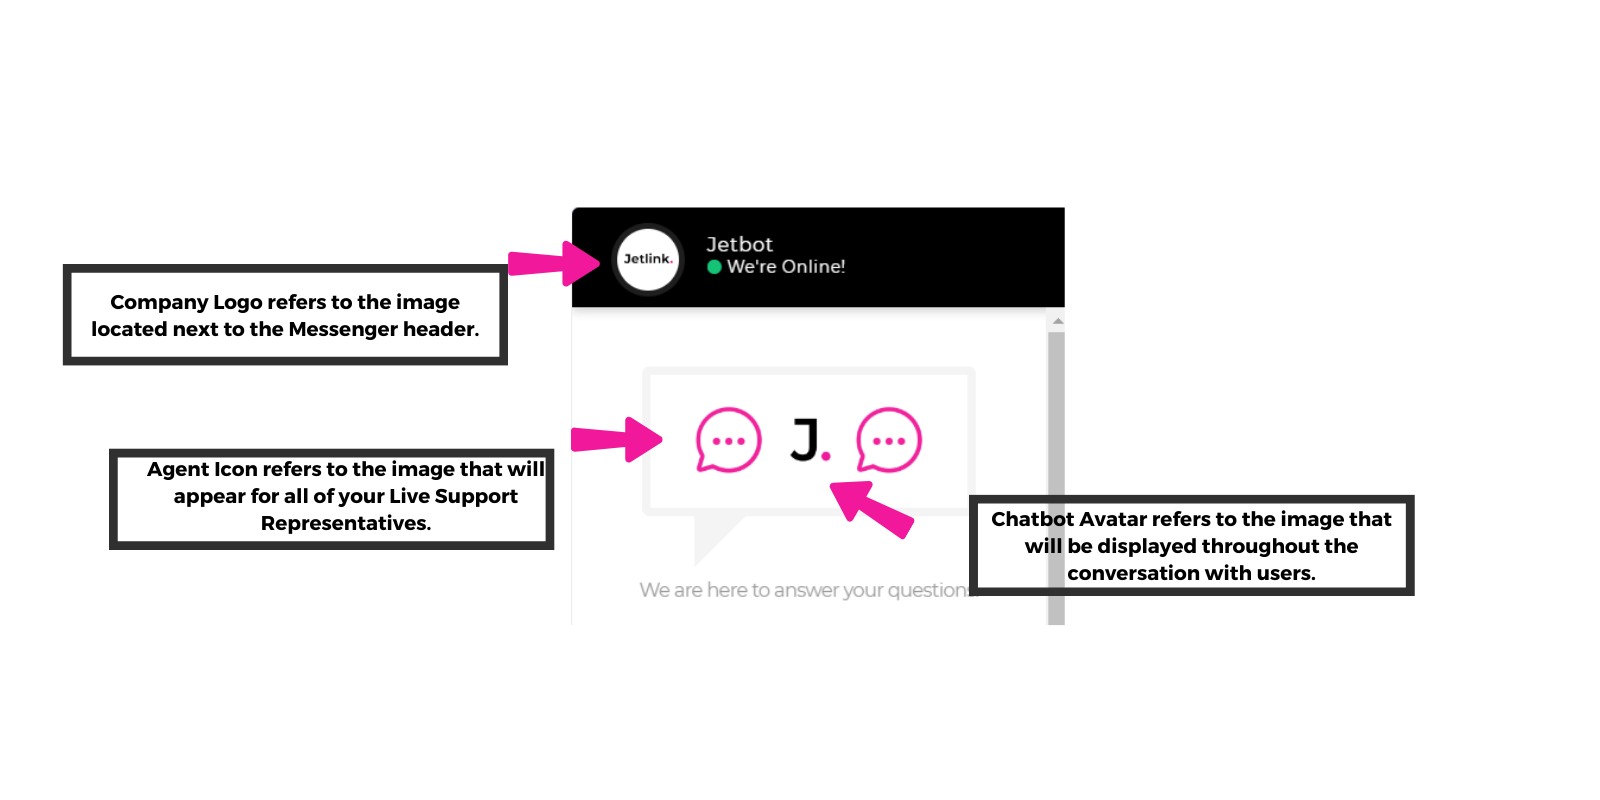
At the bottom of the screen, you will find the section where you can adjust the Messenger Company Logo, Chatbot Avatar, Launcher Image, and Agent Icon.
Launcher Image refers to the visual that will be displayed on your website to start the chat.
Note: Your images should be in PNG or JPEG format and 200x200 px in size.
You can save your changes by clicking the Save Design button at the bottom of the screen.